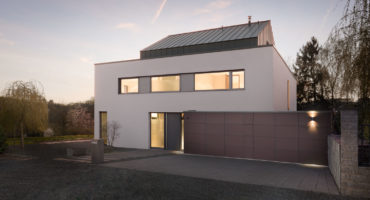
How to take interior twilight images!
In my earlier blog post „What is a twilight image?“, I mentioned that you can use the twilight technique to get stunning interior images.
Here is one example!
Why an interior twilight image is challenging!
It’s almost the same approach but slightly more challenging. Let me explain why.
In a twilight image you deal with at least two light sources, natural light and the interior lighting of the house. Sometimes I even add some flash pops to lighten certain areas to create drama.
Gel your light sources!
You got the same light sources in an interior twilight situation as well. But the artificial interior light is way more challenging. Whereas, in an exterior image the interior light has the same kind of orangy colour it’s a totally different game in an interior situation.
Every light bulb has a different colour tone, which can make it challenging to fix this problem in post. You can gel your light sources or swap the light bulbs to get an even colour tone.
If you are in a hurry, you can get away with switching on each light and shoot them one by one. That way you have the chance to fix each colour individual in post but I would not necessarily recommend this approach.
Always try to get the best possible image in camera!
As for the exterior twilight, you wait for the exact time, when the exterior light exposure matches the exposure of the interior lighting. It’s just a short moment, so I would recommend taking images every 5 minutes just before the transition from golden hour to blue hour is happening. There are tons of free apps which can tell you when that transition is happening on your location. Don’t forget to bracket your shots to get all the exposures you need.
A good reference point are your camera settings!
I shoot twilight images always in manual mode anyway and look at the histogram. I pay close attention when my camera reaches the following settings:
- Aperture: f8
- Shutter Speed: 1/5th
- ISO: 200
Don’t get me wrong, I don’t always shoot at f8 and the setting can differ in any location, therefore use it just a reference and I would always start shooting when golden hour begins.
That way I don’t miss the perfect moment and can sometimes capture a nice sunset sky, which might look amazing in your twilight image, too.
Finally, I put all my exposures together in Photoshop to make a nice composition. I’ll explain that in a different blog post. Now it’s up to you. Just start practising and you will improve your skills and find your own style of shooting twilight images.


